Steaming vents, glacial valleys, old lava flows, alpine vegetation and vivid crater lakes, await you on the Tongariro Alpine Crossing. And so do steep climbs and the unpredictable weather.
The Tongariro Alpine Crossing
Track snapshot
Distance/length: 7 - 8 hours; 20.2 km / 12 miles one way
Grade: High level of fitness required - Change of elevation about 1,196 m / 3923 feet
Track condition: Steep and undulating - Track surface is generally well formed, some sections may be steep, rough or muddy
The track
A section by section guide to the Tongariro Alpine Crossing.
Stage 1: Mangatepopo Road End To Soda Springs
Grade: Easy - Allow 1 - 1.5 Hours
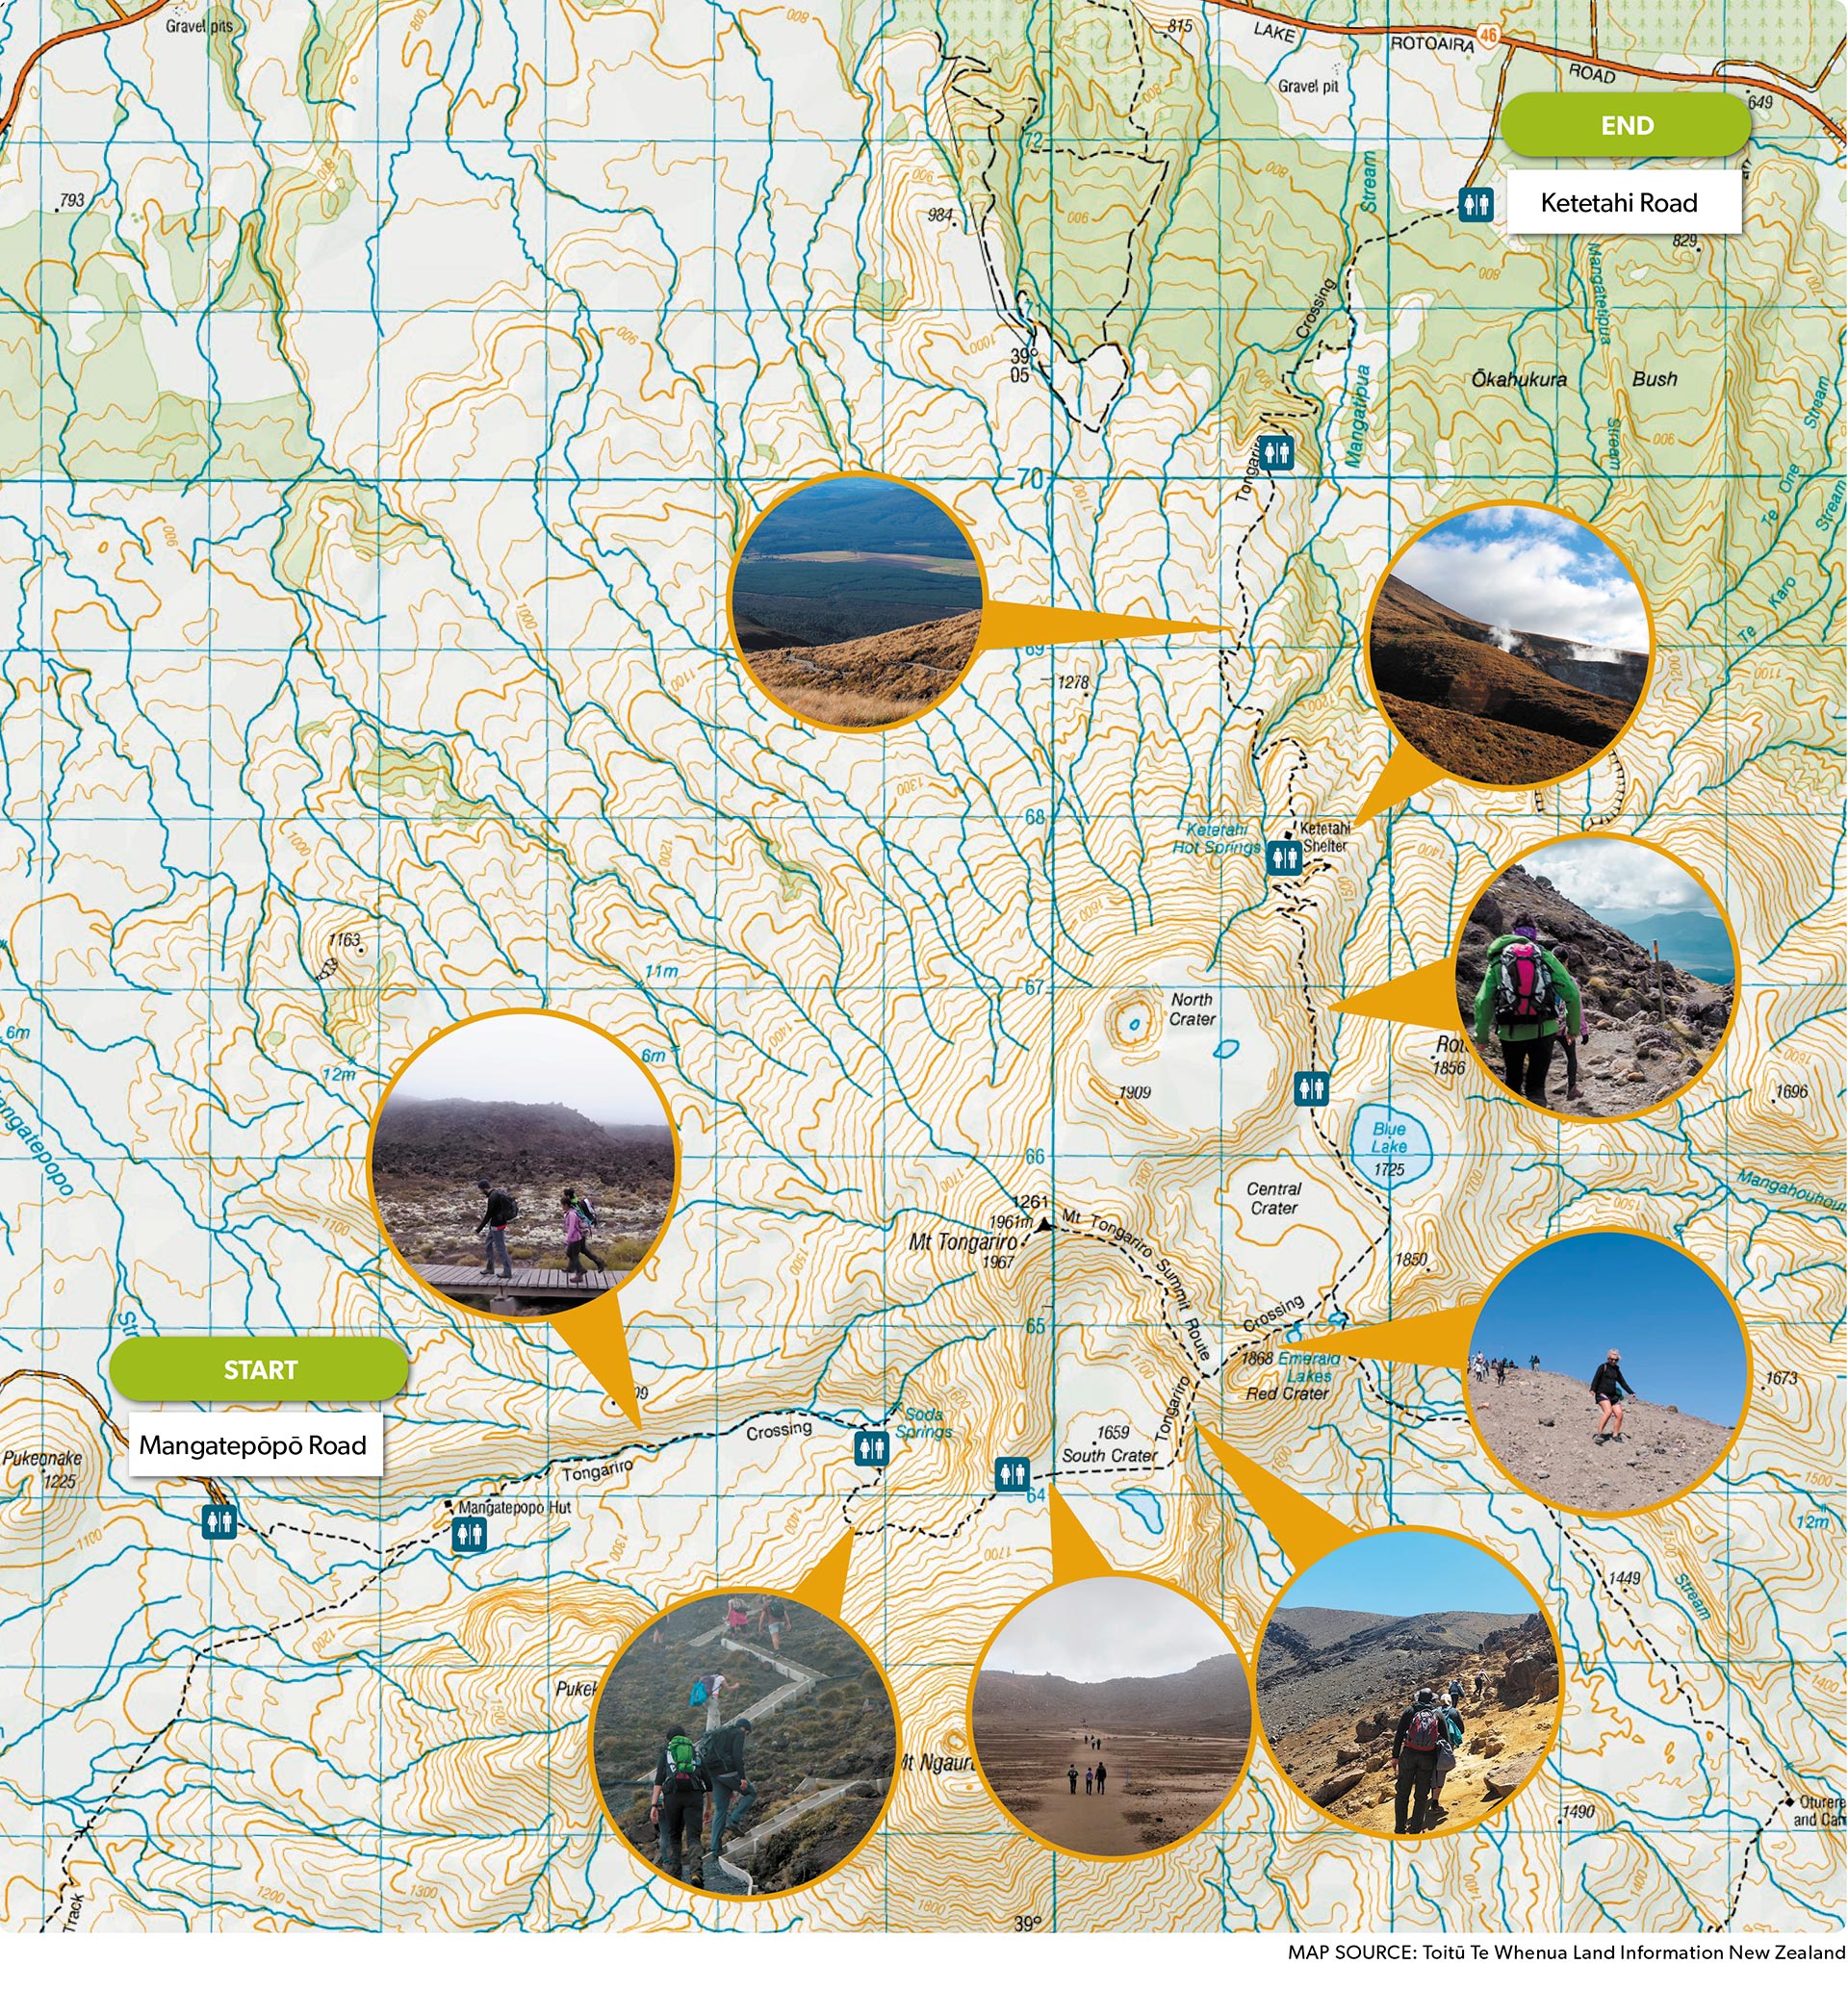
 Your transport will drop you off at the Mangatepopo Road end. The first section of the track is fairly flat, well formed and board walked in damp areas to provide stability under foot. Marker poles line the track.
About 15 minutes in from the start, the track to Whakapapa Village branches off to the right. A further five minutes on from this junction, another sidetrack leads left towards the Mangatepopo Hut and public toilet facilities.
The main track however, continues up the valley, following the Mangatepopo Stream and around the edge of an old lava flow.
As the altitude increases, walkers will notice a change in plant species along the track.
Advisory: Turn back if weather conditions are poor in the valley – conditions will get worse as you go higher up the mountain.
Toilet facilities are located every 1 to 2 hours along the track - just past Soda Springs, at South Crater, just after Blue Lakes, just before the Ketetahi bushline and just before the 17km mark. Bring your own toilet paper!
Photo: Looking east up the Mangatepopo Valley towards the Devil Staircase.
Stage 2: Soda Springs To South Crater
Grade: Moderate - Difficult, Allow 40 Minutes To An Hour
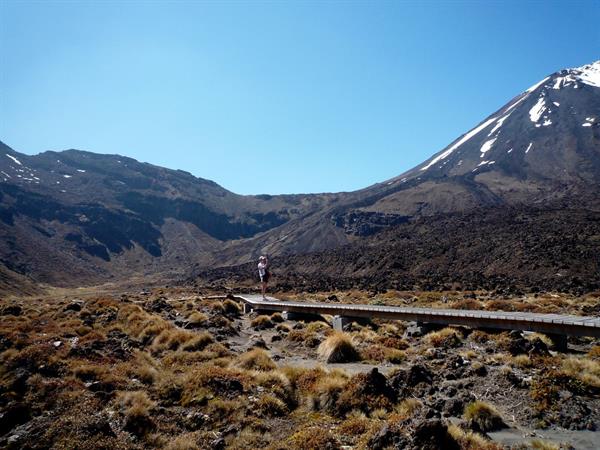
 This section of the track, known as the Devil's Staircase, is steep - climbing from 1400 to 1600 metres above sea level.
You will need to take your time on this section, but on a clear day the view down the valley and out across the surrounding countryside is well worth it. Out towards the west you may catch a glimpse of the perfectly formed volcanic cone of Mount Taranaki.
Be sure to take care, as underfoot you will be trekking over layers of ancient and modern lava flows and other volcanic deposits, the track surface is anything but smooth.
The track veers slightly left five minutes before reaching South Crater. To continue on the Tongariro Alpine Crossing follow the marked route.
Photo: Looking west from midway up towards the Red Crater ridge.
Stage 3: South Crater To Red Crater
Grade: Moderate - Difficult, Allow 1 Hour
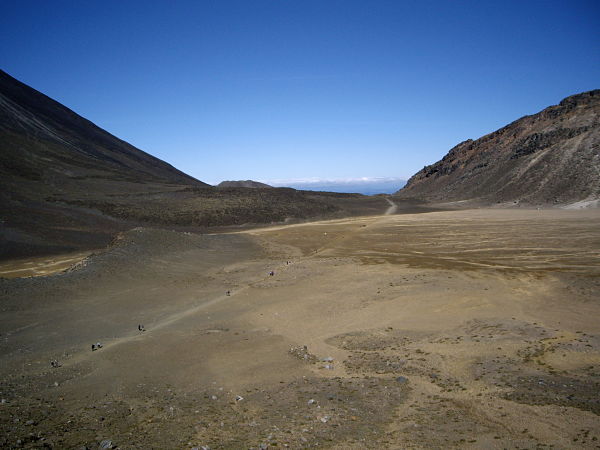
 Enjoy the flat, as it won't last forever. Once you have passed South Crater there is another short climb on an exposed ridge, the track follows this ridge to Red Crater.
The main track continues around Red Crater. Here you will enjoy spectacular views out over the Oturere Valley, Rangipo Desert, Kaimanawa Ranges and down towards the Emerald Lakes, but walk with caution, as it can get very blustery on a windy day.
Stage 4: Red Crater To Blue Lake
Grade: Moderate - Allow 30 Minutes
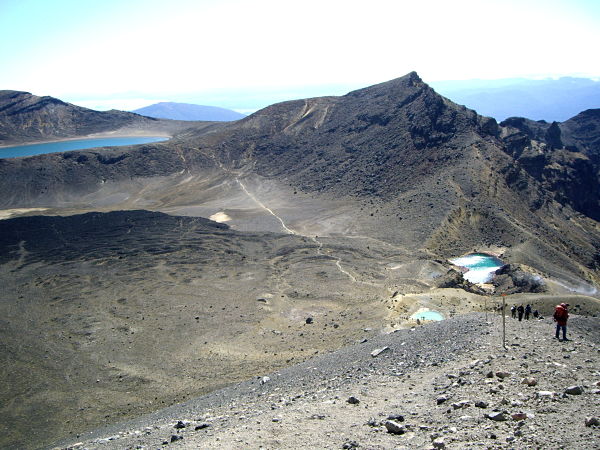 The descent from Red Crater demands extra care as loose scoria underfoot can move quickly and easily.
To the left you will see an old lava flow from Red Crater spreading out across the floor of Central Crater. To the right are the Emerald Lakes. Minerals leached from the surrounding rock cause the colour of the Lakes.
The steam vents above the lake are responsible for the sulphurous smell.
Geothermal hazards. There is geothermal activity around the Tongariro Alpine Crossing – especially near Emerald Lakes. Steam vents (fumaroles) should not be approached – steam is very hot, the ground can be unstable and severe burns are possible. Stay on the marked track at all times to avoid injury.
You will notice the track to Oturere Hut, part of the Tongariro Northern Circuit branches off just past the lowest lake.
The Tongariro Alpine Crossing track follows around the edge of Central Crater then climbs up to Blue Lake (a cold acidic lake). The lake is Tapu (sacred) and it is disrespectful to touch, enter, eat or drink around its shores.
Stage 5: Blue Lake To Old Ketetahi Shelter Site
Grade: Moderate - Allow 1 Hour
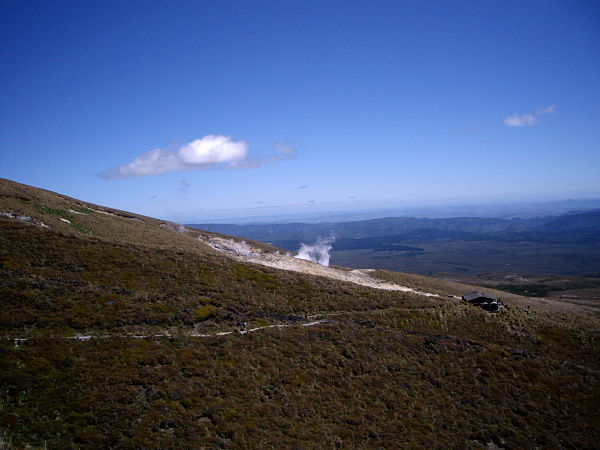 A short easy climb to the edge of North Crater. This crater was once filled with molten lava and then cooled and solidified to give a level surface more than 1000m wide.
You'll have a dramatic and inspiring outlook, in good weather there are spectacular views out over Mount Pihanga and Lake Rotoaira across to Lake Taupo
As you zigzag your way down towards the site of the old Ketetehai Shelter, the ground can be boggy and the pumice base is easily eroded - please stay on the main track.
You will arrive at the site of the old Ketetehai Shelter. The hut used to form part of the Tongariro Northern Circuit and was damaged during the 2012 volcanic eruption at Te Maari craters and has since been removed. There are still toilets here.
Stage 6: Old Ketetahi Shelter Site To Ketetahi Car Park
Grade: Moderate - Allow 2 Hours
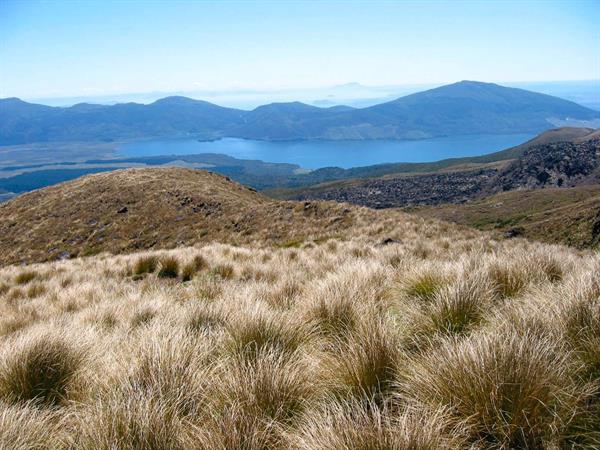 From the old Ketetehai Shelter site, the track crosses the stream that flows down from Ketetahi Springs and you will notice minerals in the water have stained the rocks.
Visitors are asked not to leave the track, as the springs are on private land. Follow the poled route down through the open tussock land to the clearing where you will find some seats.
At this point the track enters the bush line and drops steeply to the Mangatetipua Stream. A short side track leads down to a waterfall a few minutes before reaching the Ketetahi Car Park.